Showing posts with label Furniture. Show all posts
Showing posts with label Furniture. Show all posts
Tuesday, December 20, 2011
Josh Vogel's Reflections On Turning Wood
Josh Vogel from The Scout on Vimeo.
This video was produced by The Scout on Josh Vogel of Black Creek Mercantile & Trading Co. Released this past fall and beautifully done, I have watched it many times and have recommended it to many people. Everyone comes back to me saying how much they love it.
What makes this video so special is how eloquently Josh talks about his relationship to the material of wood that he uses in his craft of turning. In a time when most people are so disconnected with the work they do daily, it is refreshing to see someone who works thoughtfully and with intention.
Enjoy.
Saturday, June 11, 2011
The Trials and Triumphs of Coming Up With Creative Ideas

Looking, researching, collecting, reading, watching....
I have been gathering and developing information, shapes, colors, and texture into ideas for my next round of work. Its all been going slower then I want for the final ideas to develop. My sister always makes fun of me when she asks how's it going and I respond, "I'm waiting for the idea to come". She'll giggle and start whistling like I'm hanging out in a rocking chair until miraculously an epiphany occurs. Listen, I know how funny it sounds when I say it, but I can't help myself!
In my head, it takes some time for an idea to develop. Until I have a concrete form in my mind, I do not go ahead and start building. I also usually don't start sketching until that form appears. This is completely contrary to how you are taught in school to design or make art. You are taught to do research and immediately start drawing and making models until the final product develops. I have always had problems with that method. While I understand how it can be beneficial and on plenty occasions have used that method, it mostly leads to me becoming frustrated. I usually feel like I am wasting my time because my lines don't make sense or the materials and composition are all wrong, and I give up on the idea. If I ruminate over an idea and give it enough time, it will start to materialize into a finished piece in my mind. When I go to make it, about 95% of the time, it will come out exactly as I imagined.
However, all of this doesn't really matter when sometimes, no matter what, you cannot come up with anything. Not one stinking idea or desire to create anything. Believe me, when this happens, it really really sucks. Sometimes, it can be years that go by and you feel like this.
Several years ago, a good friend of mine gave me a book written by Steven Pressfield called The War of Art. This book was a real eye opener and I have read it many times over the years. I could try to sum it up, but this excerpt from Pressfield's site offers the best summary. -
"What keeps so many of us from doing what we long to do? Why is there a naysayer within? How can we avoid the roadblocks of any creative endeavor—be it starting up a dream business venture, writing a novel, or painting a masterpiece?
The War of Art identifies the enemy that every one of us must face, outlines a battle plan to conquer this internal foe, then pinpoints just how to achieve the greatest success."I am lucky that most of my closest friends are creative and we are able to lament to each when we are in a state of war. It will usually take one of us piping up to say, "All right, suck it up and get in the studio." Which sadly, is the only sure way of breaking through the road block and getting creative. The truth that none of us like to admit is that we, ourselves, are what keep us from achieving our goals. Sometimes, me sitting around waiting for an idea to form is just an excuse for avoiding getting into the studio. So, when I am done with this post, I promise that idea that is forming in my head- I will get in the studio and start doing it.
Wednesday, May 18, 2011
ICFF 2011 - Part Three

Part Three of ICFF Coverage -
Timorous Beasties!!! I love this new collection of Nottingham lace. This company exploded onto the market with their wallpapers and I am really impressed with the textiles they are producing.

I also love this Wool Voile Collection. The patterns are incredibly interesting. The influence is from traditional designs but Timorous Beasties put such a perfect dark modern twist on them. I hope that I have the opportunity to visit their factory or studio someday.


Part Four to come...
Tuesday, May 17, 2011
ICFF 2011 - Part Two

Part Two of my ICFF review- As I mentioned in the earlier post, my photos didn't come out great. Here is a continuation of my notes, in no particular order.
I love the above set up for Heller. This backdrop image of Frank Gehry cracks me up! The booth was simple, but effective. Ironically, this collection isn't my favorite work by Gehry. It is made of roto molded polymer, which is a great material for outdoor furniture. I find that some of the forms look outdated. But, hats off to the display!

 |
| Photo taken from Rapture & Wright website. |


Manulution uses traditional hand carving techniques from Bosnia and Herzegovina, which is shocking because I thought the carving details were all done on a CNC! Whoever is doing the carving is immensely talented. Unfortunately, a lot of the furniture line is overdone. The carving should be the highlight, but it often gets over shadowed by the billowing edge shapes and busy metal bases. Although, I am excited by the line's mix of tradition and craft with a modern sensibility.

I will continue, tomorrow, with Part Three of ICFF.
Monday, May 16, 2011
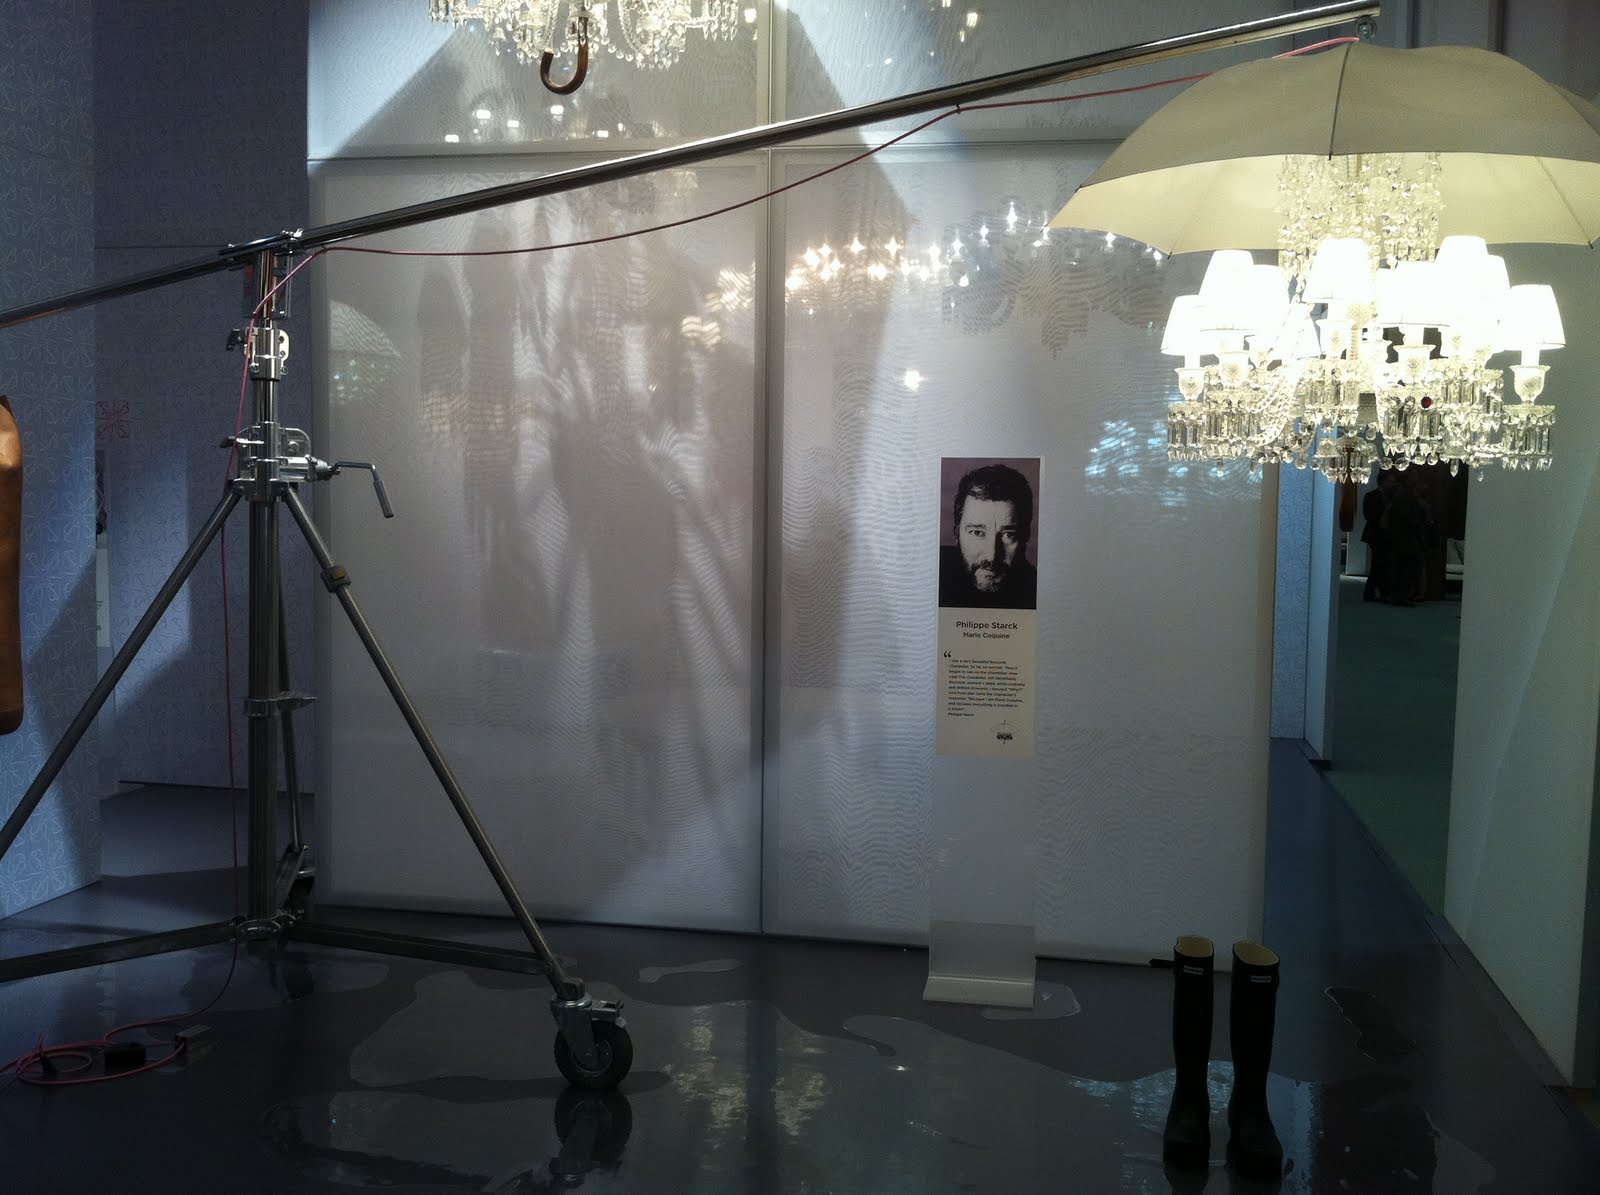
ICFF 2011 - Part One

I try to go to ICFF every other year to see what is happening in the USA furniture market. Some years are better then others. This year was neither here nor there. The satellite venues, throughout NYC, have been gaining momentum over the past few years. More of the experimental pieces and installations are being shown at the satellite locations then at ICFF. This isn't a bad thing. It is now defining how designers want their work to be received. ICFF is geared toward the professional Interior Designer, Architect, and Manufacturer. When at ICFF, its about the business of furniture. ICFF also guarantees that a lot of people will see the work. The satellite locations have a smaller more personal feeling and allow the ability to have a more expressive display of design. The work isn't confined to a booth. The environment (store or gallery) becomes part of the whole experience of the work. I didn't have time to explore much of the satellite locations. I wish I could have stayed for several days to explore all the venues. There is so much to see during design week. I was able to go to the Matter opening last night, which was wonderful. I will post about it this week. Below is Part One of highlights from ICFF that I found to be interesting. I should mention that a lot of my photos came out kind of crappy. I'm willing to blame it on the convention center lighting and not me or my IPhone 4. In no particular order -


In a completely different take on stools, here is a set by Tucker Robbins, the notoriously zen designer. The texture of the weaving on the bases is really interesting. The color choice also works well with the tone of the wood.


Part Two of the ICFF review will be coming up later today.
Monday, May 9, 2011
Knoll Textile Exhibit At Bard Graduate Center

The exhibit, Knoll Textiles 1945 to 2010, is on view at the Bard Graduate Center from May 18th to July 31st. The show will be covering the history of Knoll's textile division. It ends up that most of the Designers were women. I plan on going to see the show. I am surprised that the opening is after ICFF, International Contemporary Furniture Fair, when most people who would be interested in the show will have already left town. Odd choice.
In the Chaise piece above, I used a traditional Knoll Boucle in Cayenne. Knoll fabric is a joy to work with. Its durable, thick, and easy to sew. This piece was made many years ago and shows no sign of sun fade or wear. I'm more concerned with the foam breaking down before the fabric gives out. Whenever you see an old Knoll furniture piece, usually the fabric has lasted strongly and is just in need of a good cleaning. Knoll has always understood what it takes to make a high traffic piece last. While over the years I have studied a lot about the company's furniture, I welcome the chance to learn about their textile department.
Wednesday, February 16, 2011
Crate & Barrel and CB2 Outlet in Cranbury NJ

Who knew? There is a Crate & Barrel and CB2 outlet in Cranbury, NJ.
The only reason I found out was by calling CB2 to ask a bunch of questions about the Alpine Gunmetal Bed. I have been deciding whether or not to buy this bed, for myself, for a few months now. As a furniture designer, it's always hard to justify buying a piece of furniture when you feel like you should make it yourself. It ends up being a real struggle of conscience. When I called CB2, the representative suggested that I go to the Cranbury store to see if they had one in stock. I was so excited to know that they have a store in NJ. I was surprised when I went there that it is actually a Crate & Barrel outlet with some CB2 items. The representative failed to mention that!


Overall, the outlet is definitely worth checking out. You never know what great finds await!
Friday, February 11, 2011
How To Reupholster and Repair Danish Modern Chairs

Below is a step by step guide on how to reupholster and repair Danish modern chairs. Please let me know if you have questions on any of the steps.
Materials:
Clean area to work
Screwdriver
Chisel
Hammer
Pliers
220 sandpaper
Steel wool
Gorilla glue
Water
Murphy's Soap
Rubber gloves
Scotchbrite
Watco Danish Oil
Rags
Vinyl - 3 yd for 4 chairs
Black fabric for under the seats - 3 yd
1/2" thick foam - 2 1/2 yd
3M Super 77
Felt feet to protect floors
Staple gun
Staples
Scribe tool
How To Reupholster and Repair Danish Modern Chairs:
Step 1- Assemble all materials and prepare a large enough area to work in. An area will be needed to clean the chairs and another area to lay out the fabric and foam. My studio has a ceramic tile floor. While it is not the prettiest, it allows me to get the floor wet and to then mop it up or vacuum easily. As you start to disassemble the chairs, you will have a mess as the old foam crumbles and the fabric starts to shed. If you don't have much room inside, a couple of these steps can be done outside, weather permitting.
Step 2- Disassemble the chairs. Take photos or notes while you are disassembling. Everyone always thinks they will remember how they took something apart, but they never do! It will make your life a lot easier if you document your process.

With these chairs, you need to remove the wooden buttons to get to the screws that hold the chair together. The buttons will pop out if you place a Scribe tool in the corner and pry them out. Sometimes, you will have to sacrifice one that splits. They can also be repaired with glue, as they are just cosmetic. Put all your screws, buttons, and parts together with each chair. Label each chair and each part to that chair. This is very important. Wood can get tired and cranky when its old. Most likely you will not be able to interchange parts from different chairs and you will be just as tired and cranky if you have to try to make them fit.
Step 3- Clean the teak wood. Depending on the condition of the chairs you are working with, you may be able to skip this step. As I mentioned, the chairs I was working with had a layer of grime on them from cigarettes. I could run my thumb nail along the surface and scrape a black coat of filth off. Gross. Using hot water with a bit of Murphy's Oil, scrub the chairs with Scotchbrite. Change the water often. If you can get away with only using a rag, try to. It took a long time to remove all the dirt. Allow the chairs to thoroughly dry.
Step 4- Examine the wood for any cracks, splits, and damage. If the chairs are perfect, skip this step. Because teak is an oily wood, regular wood glue will not work for repairs. Gorilla Glue will need to be used. One of the chairs had a split on the side member. I dampened the wood and shoved the Gorilla Glue into the split. I then clamped two scrap pieces of wood on each side to hold the repaired piece in shape. I let it sit overnight for the best results. When taking the assembly apart, carefully use a chisel to scrape any glue that has oozed out of the crack and onto the surface.
Step 5- Sand the entire surface of the chairs with 220 sandpaper. Teak wood can dry out overtime and needs to have oil reapplied. Sanding the surface will ensure that there is no residue or foreign material on the wood. By creating an even surface, the oil will absorb nicely.
Step 6- Apply the Danish Oil or Teak Oil. Using a clean dry rag, follow the instructions on the back of the Watco Danish Oil can. I like to use the Danish Oil Natural, but feel free to use the Teak Oil. There isn't much of a difference between the two types. Between coats, let the wood dry overnight. Before applying the next coat, rub the entire surface with superfine steel wool. Put 2 to 3 coats of oil on the wood. After final coat, rub entire surface with superfine steel wool. It will bring up a nice shine to the finish and make the wood sing. Place wood frames to the side.
Step 7- Remove old reupholstery. Take the seats and remove the staples from under the chair with a screwdriver.

As seen in this photo, I put newspaper over my table. When taking the old upholstery off, a lot of it just crumbles and falls apart. When I'm done, I can gather up the paper with all the debris and throw it away. Follow the same method with the backs.


Once all the fabric and foam is removed, use the chisel to scrape any remaining foam that may be stuck to the wood.
Step 8- Apply foam to seat and back. Carefully layout the seat and back parts on the foam. Cut the foam to size. Do this outside or in a well ventilated space.- Spray Super 77 onto the wood and the matching side of the foam. Place the foam on the wood and work the two materials together. Super 77 is sneaky to work with. Try to keep from getting any on your hands, or you will be amazed how everything that becomes stuck to you- lint, dirt, foam, your dog, etc. Let the Super 77 dry according to the directions on the can.
Step 9- Carefully layout the seat and back parts on the fabric. I used black vinyl because I find it to be era correct and desirable to the market. I chose a more expensive vinyl that looked fancier and was a better quality to work with. Vinyl, in general, is hard to work with because it is stiff. To make the process easier, choose a fabric without a repeating pattern.

Also cut out the pieces of black fabric for the underside of the seat. It is a nice finishing detail.
Step 10- Attach the fabric to the seat and back. This will be the hardest step in the whole process. Use a staple gun with the appropriate staple length. I use an electric staple gun because it is hard to have the strength to staple through all the layers manually. For the seat, start in the center of one side, secure your fabric in place and begin to staple around the perimeter, pulling the fabric tightly. Unless you have meaty hands, your fingers will be sore from this. Staple the corners last and try to work the fabric over the corners smoothly.

Applying the black fabric after will create a nice finish detail and make the underside of the chair disappear. For the back, start by stapling on the bottom edge. Wrap the fabric over the front to the back and fold the edge. Place the folded edge on the bottom and staple to secure. Then, wrap the sides and staple the sides cleanly. Unfortunately, I forgot to take photos of the back assembly. So, let me know if there are any questions. Sometimes the staples will not seat all the way down when stapling. Use the hammer to nail them fully in.
Step 11- Reassemble the chairs. Using your notes or photos, labeled screws and wooden buttons, put the chairs back together. Apply felt feet.
Step 12- Fini! Stand back and admire your work.
These Danish modern chairs, which have no official name that I am aware of, are really great. They have survived the test of time because the design is well thought out. It has minimal pieces and assembles easily with screws. Teak is a durable wood. The proportions are perfect. Whether you are small or large, you will fit comfortably in them. They also do not take up a lot of room and they are fairly easy to find.
Good luck with your project!
Saturday, February 5, 2011
The New Architectural Digest
 |
| Image from the NY Times |
Now my curiosity is stoked. If the snow holds up today, I may go in search of the new mysterious issue. Have no doubt, I will report on my findings.
Tuesday, January 4, 2011
Blackcreek Mercantile & Trading Co. on The Scout
 |
| Photo by Rose Callahan from http://thescoutmag.com |
This week, they featured an extremely well written article, by Sarah Williams, on Blackcreek Mercantile & Trading Co.; highlighting the turnings of Joshua Vogel. The article captures the nuances and grace of woodworking and the talented woodworker.
I personally have the pleasure of knowing Josh and Kelly. Having visited their new studio, I can say that it exudes warmth and creativity. Josh is incredibly talented and has taught me a lot about woodworking. I look forward to seeing his new work!
Sunday, October 31, 2010
Konstantin Grcic and Design Miami
In this video by TheCrane.tv, via NYTimes Magazine, Konstantin Grcic talks about his design process and inspiration. I have always admired his work and its great to hear him talk about it. He was just named Design Miami's Designer of the Year for 2010.
Saturday, October 2, 2010
Simple Hallway Redesign
 A client wanted to update their apartment, quickly and cheaply. They have a lovely modern apartment, in Brooklyn, with floor to ceiling windows. We ended up using some of their old pieces and mixing in some new buys. I wish I had a photo of the foyer before. It was all white with nothing hanging on the walls and no where to place keys and mail, when they entered. To give the entrance a little zing, we painted one accent wall Benjamin Moore- Stem Green in eggshell, $50.00. I purchased the BluDot Strut Console in olive, for its color, price of $399.00, and slim dimensions. I found this large mirror at Home Goods for $68.00. A total bargain for its size and detail. Then, I picked up the glossy vase at Pier One, on clearance for $10.00. Total: $650.00 with taxes and delivery.
Wednesday, September 29, 2010
Target Table
 I was shopping for a client and I came across this table at Target. I believe it was on sale for something ridiculous like $12.99! (I should have written the price down or just bought it.) Look how great it is! It would look killer in a fancy house mixed in with some high end pieces. No one would ever know you purchased it a Taaaar-jay for such a fabulous price. Sometimes, it just kills me to see a mass market piece done so well. I couldn't even think about making a table for this price.
Subscribe to:
Posts (Atom)


